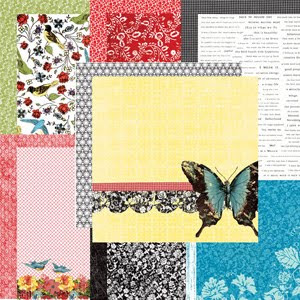
The design team was inspired by this fun ad! The December kit worked great with it. Feel inspired? Create your own layout and upload it into our gallery. 
 "time flies"
Becky Thackston
 "winter delight"
Holly Pittroff
The design team was inspired by this fun ad! The December kit worked great with it. Feel inspired? Create your own layout and upload it into our gallery.
"time flies" "winter delight"This is one of the December kits' altered items - the Heidi Swapp Mirrored Album. The cover is a mirror and it comes with multiple acrylic pages for the inside. I even used one of the acrylic pages combined with a Heidi Swapp patterned paper to create the cover look. This project is really different - I had a lot of fun making it. TFL! Spread your Wings Cover


Our DT is using one sketch this month and here it is! This multi-photo Becky Fleck sketch can easily be turned into any themed layout (or card). Check out what Becky, Gina and MJ created! Feeling inspired? Create your own layout using this sketch and upload it in our gallery. 
 Gina Johnson
 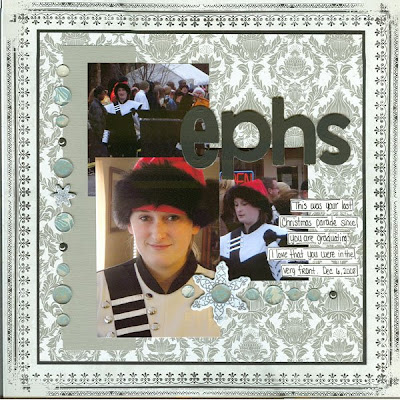 Becky Thackston
 Mary Jo Johnson
 Part of the December I Am a Scrapaholic kit is this bottle of DecoArt Snow Writer. Use it straight from the bottle and when it dries, it has a "snow" look. It dries with a rather dull, bumpy finish.
  I added an additional "SNOW" feel with a brush of glitter that I added to the velvety snowflake and the Snow Writer touches. I used glitter kind of glue by DecoArt called Glitter Twinkles. It just brushes over the surface and dries with a great amount of glitter. It was fun to add that to my snow look.
 Thanks for visiting, Linda
December's Little Pill kit has a really fun adhesive to use on your cards or layouts. It allows you to create lots of dimension on your projects without the mess of sticky glue dots or pop dots that come off a few months after you use them! We all know how annoying THAT can be!
With the Helmar "Scrap Dots", you can add as much height/dimension to your layouts that you want! It's so easy to do--just simply layer the Scrap Dots onto your project, wait a few minutes, then add another layer onto the original to create height.


On my embellishment cluster, I added several layers of Scrap Dots under random items to give it a variance in height.
Happy Scrapping!!
~~Kary
Gina Johnson, our December Visiting Therapist, has made the cutest little mini album with an accordian album, an altoid tin and our December kit! Check out her creation!
I love making these for gifts for so many different reasons! They’re small and don’t take long, they’re easy to personalize for whoever you’re making it for and they can stand a lot of beating. That last fact is really important if you’re making it for a grandma or someone who is going to throw it in their purse and take it everywhere!
Ok, to start off you’re going to need a piece of cardstock 10 5/8 x 3 ½, a Altoid tin, scraps of patterned paper, Modge Podge, and acrylic paint and embellishments (if desired.)
To start off I painted the top of my tin with white acrylic paint. If you don’t want to do this you can also just wrap a ribbon around the exposed edge after you’re done with everything else. It’s ok if the top is streaky because you’re going to cover it anyway. I was mainly painting it to get the edge covered since it didn’t match my pp.


 I know I have said this before, but I just love how Lynn puts together the I Am A Scrapholic kits. The ingredients just "go together"!
  The blue/swirl patterned that goes down the length of the card is actually a big circle on the patterned paper. I just took advantage of that design and used a portion of it for a card. I added Broken China Distress Stickles by Ranger to accent the swirl pattern. It is the perfect color and I love adding sparkle for a Christmas or Winter themed card. (another portion of this circle design was cut and used as an accent on my layout in the previous blog post regarding the "ad" challenge)
This month our DT is using ads to get inspired and create with the kit. That you Elisa for this fun ad! Take this challenge and post your creations in the gallery - we'd love to see what you come up with!
 'Starbucks'
 'mmm...good!'
This is one of my favorite projects for make for the holidays, and December's kit made it super fun!


The December I Am A Scrapaholic kit has the most yummy colors in it. I just had to pull out this wonderful patterned paper by Heidi Swapp and it just seemed like it was made to go with this fabulous, velvety snowflake.
 I combined the velvety snowflake with a BIG button and the black, scrolly circle punch-out to create a little center piece to my card. I added the button with little silver brads. I mounted these pieces to a silver metallic paper and punched that out with a scallop punch and I sprayed the entire thing with Silver Glimmer Mist by Tattered Angels. You can just barely see the little bit of gleem that the silver cast on the whole card.
 I love the pre-cut cards and matching envelopes that come in the Card Kits each month! Here is just one example of a combination you might see.
Using a minimum of product from the Nov kit, I was able to turn this into a special Christmas wish for someone I love this season. TFL!
 Products:
SEI Alpine Frost Yuletide, Dust of Snow, Chocolate cardstock
IAAS Card and Envelope die cuts
Bo Bunny Oh Christmas Tree Rub-ons
Kaiser Holly Swirl Wood Flourish
Making Memories Holly berries
Ranger alcohol ink - Lettuce, and Stickles - Candy Cane
 Are you ready for some Christmas projects???
  I wanted my photos to really shine in my little album, so I left the album as it came and printed my photos out 4" x 6" and then trimmed them a little bit so that some of my patterned paper would show.
 The snowflake is chipboard and is part of the kit. I covered that with a good coat of Stickles. I love that stuff because you get lots of bling without loose glitter ending up all over the place. You can also see the rhinestone word by Kaiser Craft that is part of the kit. It wasn't going to show off real well against my patterned paper so I just put a swipe of white paint on the paper first and that created the perfect backdrop to my word.

